CS 180 Project 2: Fun with Filters and Frequencies
In this project, I had fun with filters and frequencies.
Part 1.1: Finite Difference Operator
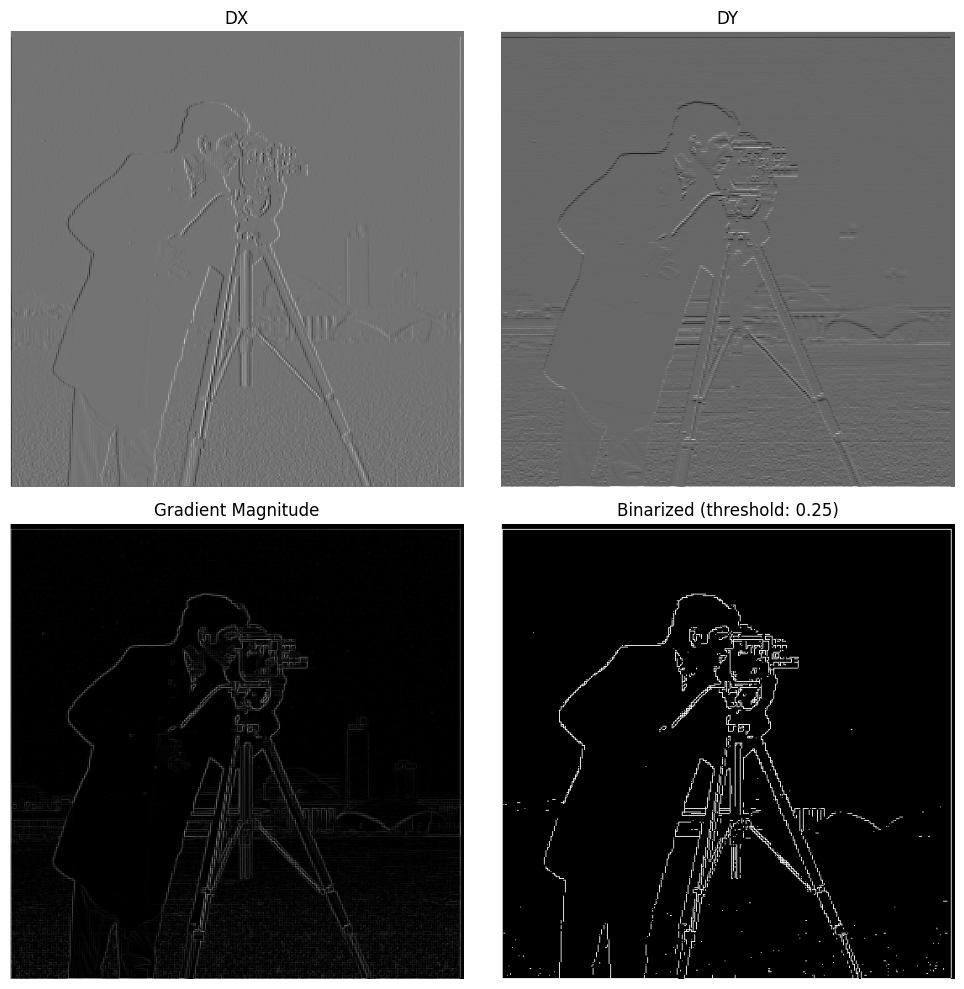
I started off by applying a simple finite difference filter in the x and y directions. The x filter has the shape [1, -1] to be able to detect changes as you move left to right across the image, and the y filter has the shape [[1], [-1]] to detect changes when moving vertically.
First, I applied the dx and dy filters, and then I computed the gradient magnitude by using the pythagorean theorem. In order to do this, at every pixel, I calculated the dx and dy values, and calculated the gradient magnitude by taking the square root of dx^2 + dy^2.
Part 1.2: DoG Filter 🐕
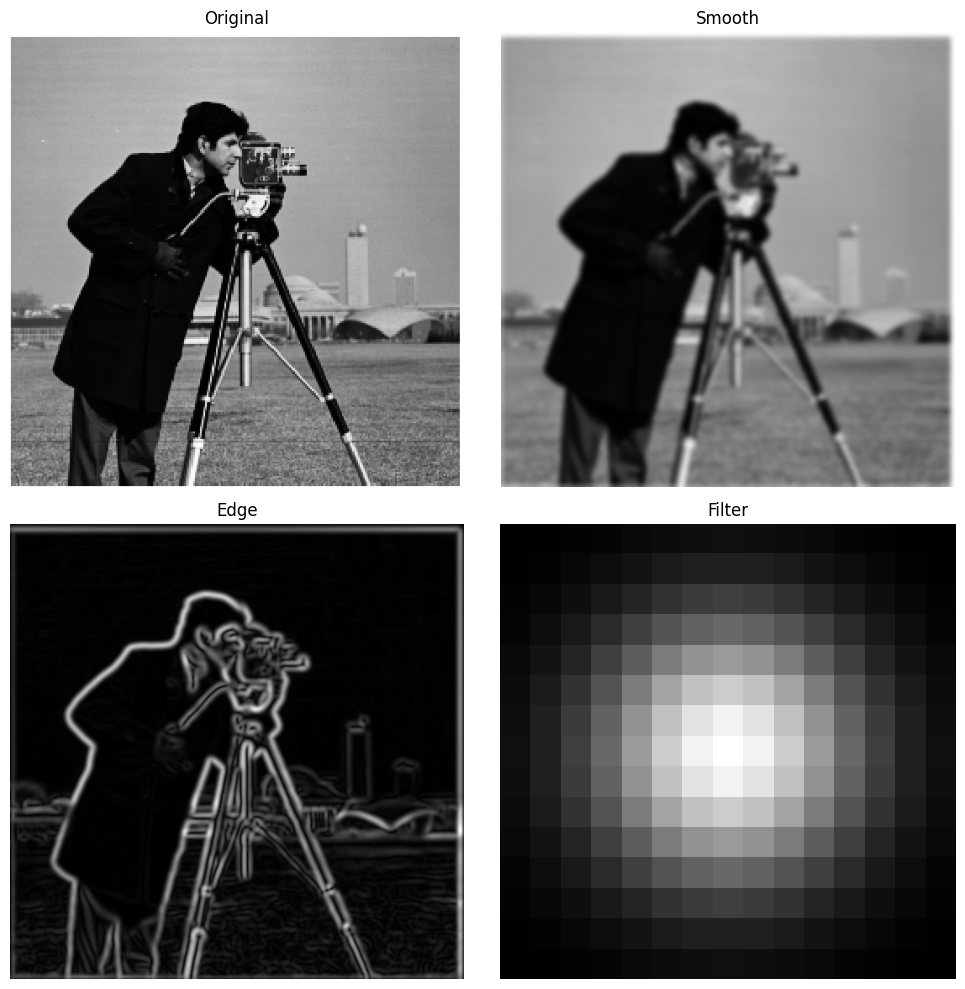
In order to make the process less noisy, I got cleaner edges by creating a blurred image and then applying the dx and dy filters from above. Blurring first yields crisper edges because noise between adjacent pixels doesn't play as large of a role.
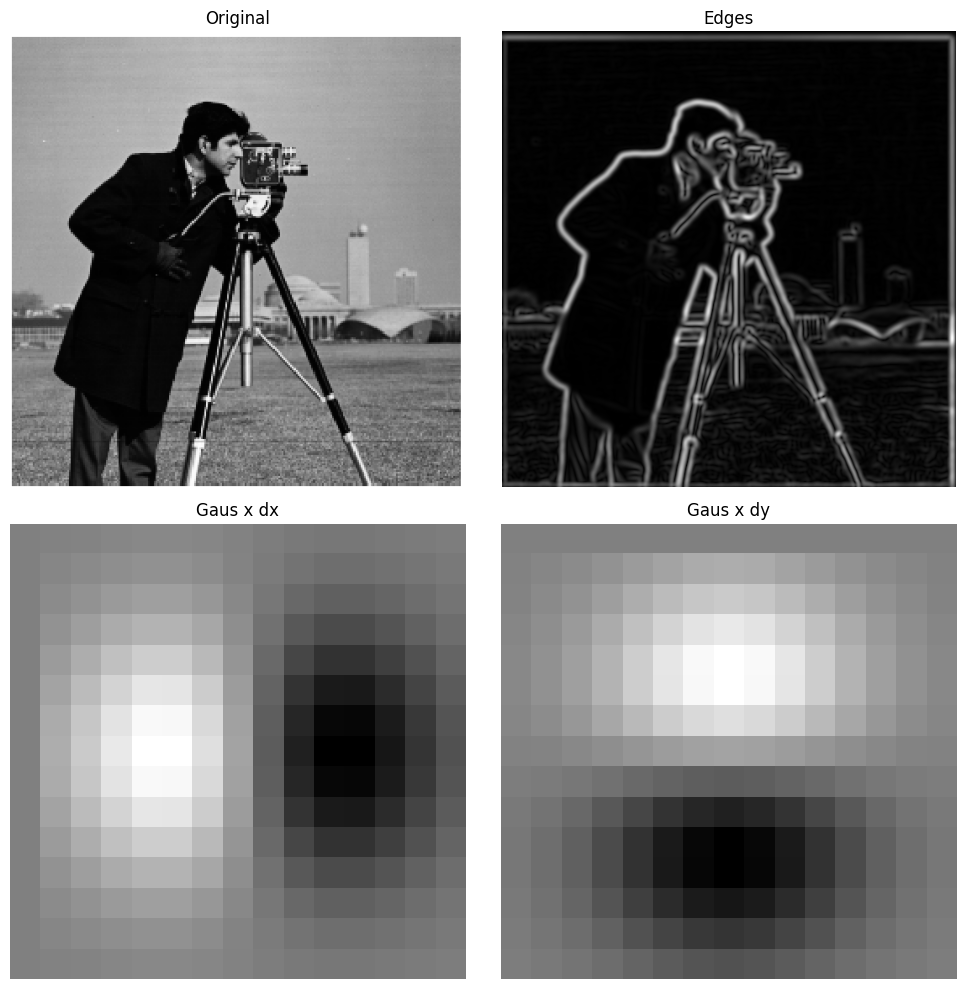
I was also able to get the same results with a single convolution by creating a derviative of gaussian filters, as shown below.
Part 2.1: Image Sharpening
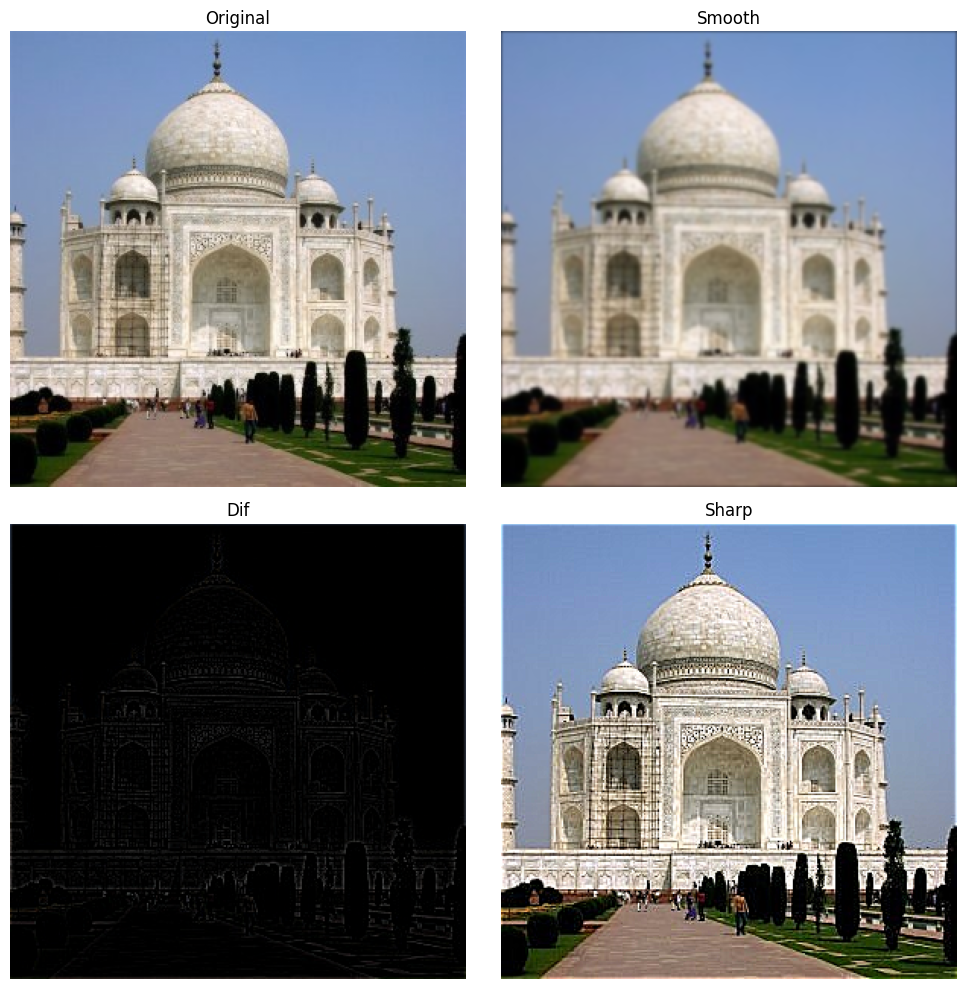
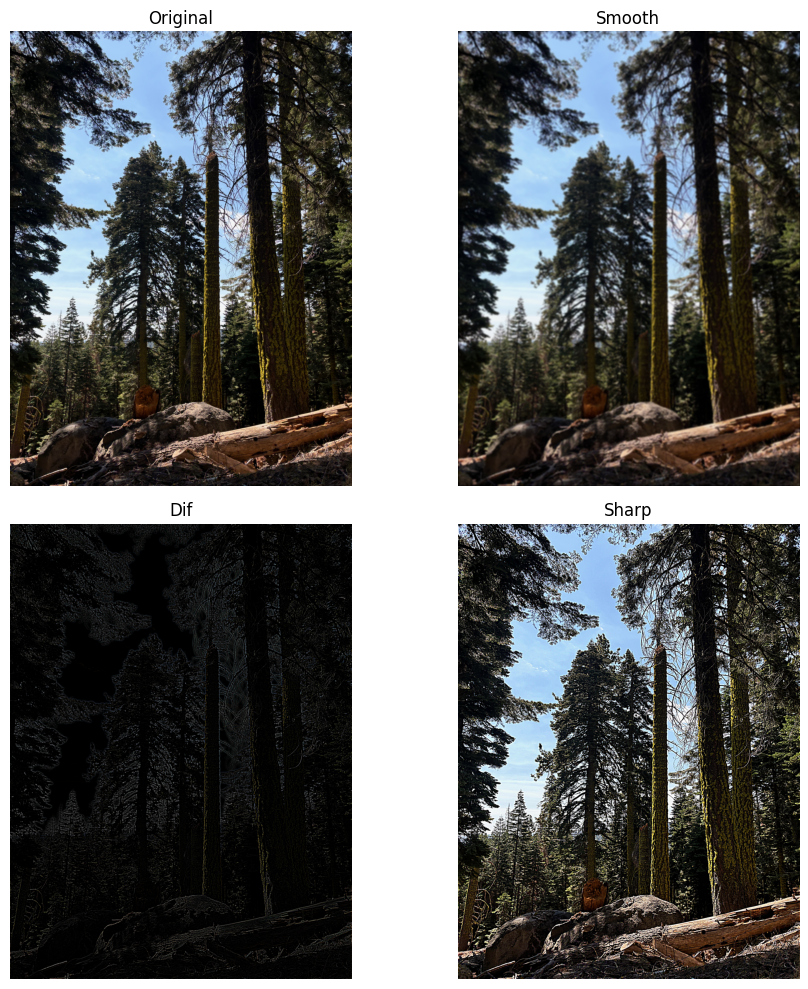
In order to sharpen an image, we can smooth it first, then compute the higher frequencies by subtracting out the smooth portion, and add it back in! This can be done with a single convolution operation.
I also applied this to my own sharp image of a forest, and it worked pretty well too!
Part 2.2: Hybrid Images
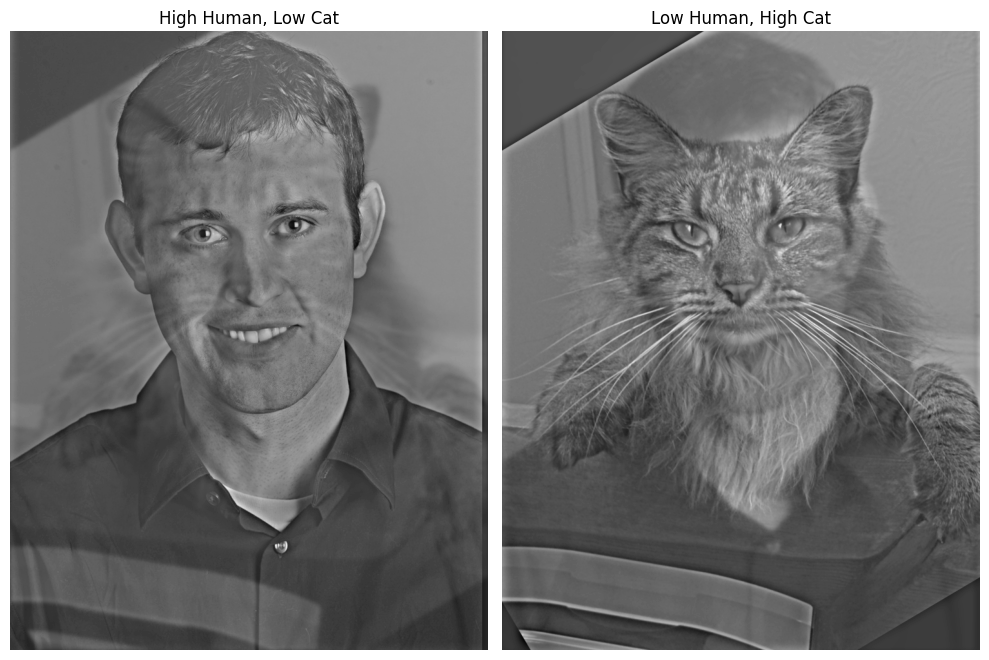
To create hybrid images, I first used the given alignment code to make Nutmeg and Derek's eyes line up. Then, I converted both to grayscale for the first step. In order to blend the images together, I applied a low-pass filter (essentially trimming high frequencies by smoothing with a Gaussan filter) to one image, and a high-pass filter to the other (essentially the sharpening filter from the earlier section).
I tried keeping the high frequencies from the human, and the low frquencies from the cat. I also tried keeping the high frequencies from the cat, and the low frquencies from the human.
I ran a hyperparameter sweep across different sigma values, and this was my favorite result. Here, sigma for the high frequency cutoff is 8, and for the low frequency it's 3.
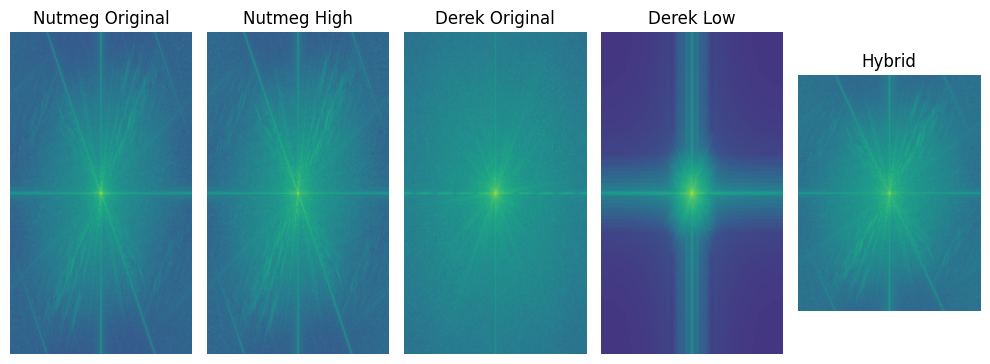
Here is the log magnitude plot of the fourier transform of the different images.
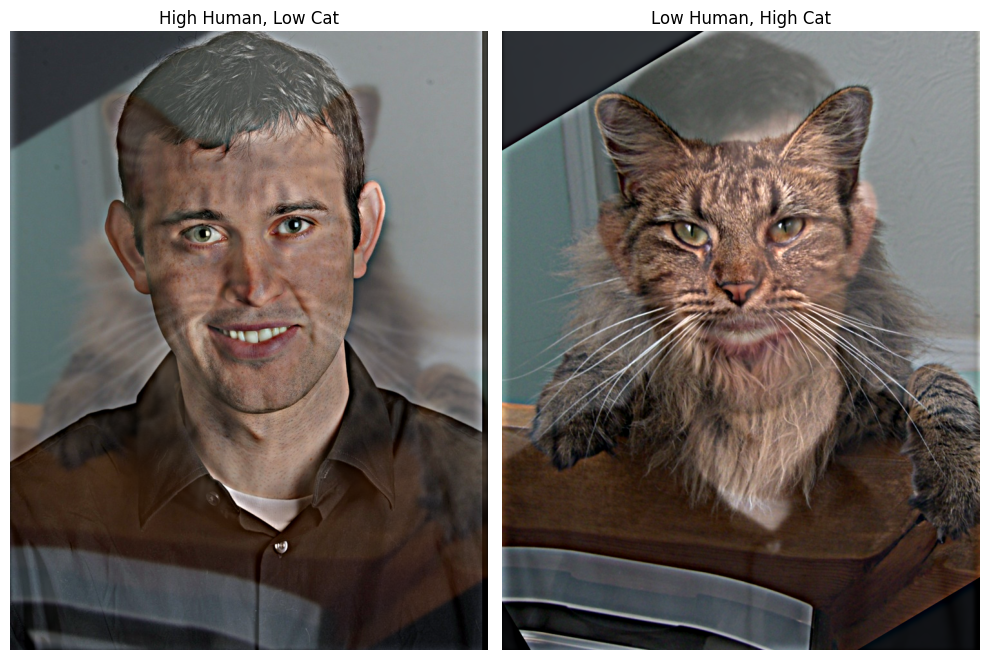
I also tried to use color to enhance the effect. I think it works better to use color from both components to allow for the most natural blend.
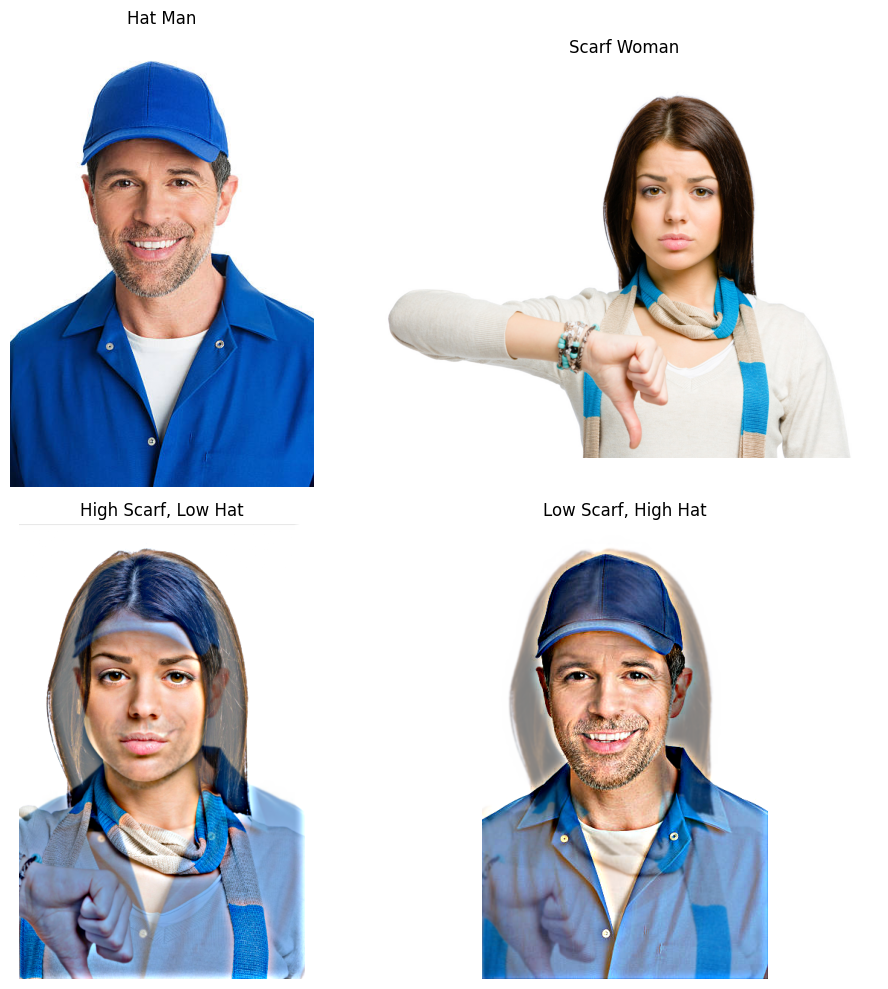
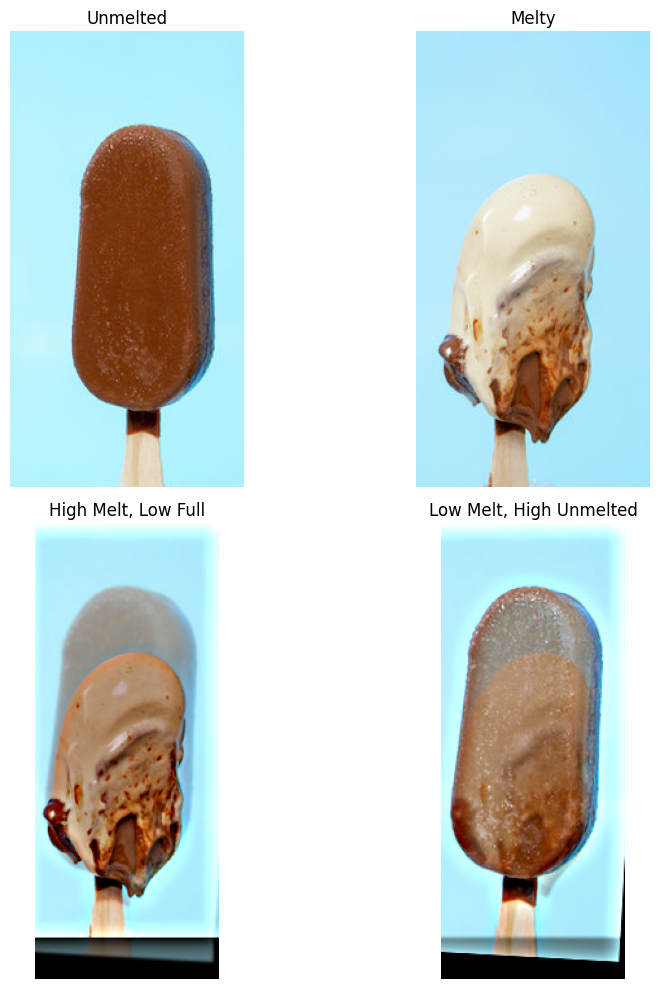
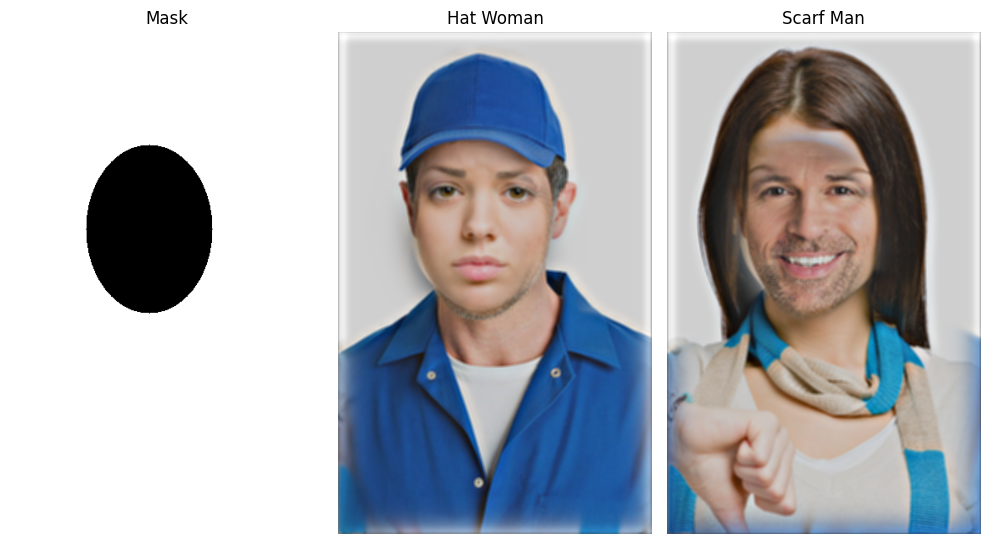
To play around with the method, I also applied it to stock images of a man wearing a hat and a woman wearing a scarf. I also tried a transition with a stock image of ice cream melting. I would consider the stock image people a failed hybrid image because their facial features don't blend together very smoothly.
Part 2.3: Gaussian and Laplacian Stacks
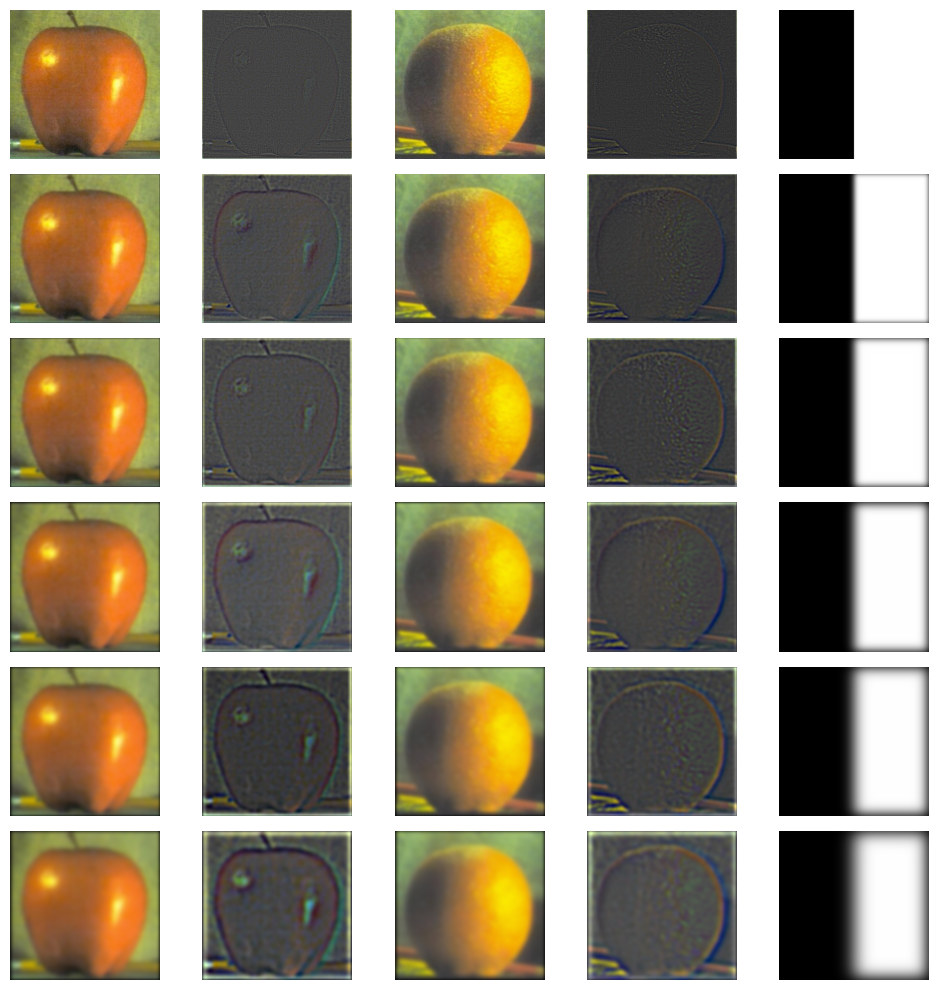
To create a Gaussian stack, I recursively applied a gaussian filter to a more and more blurry image. To get the Laplacian stack, I subtracted sequential images from the Gaussian Stack. Here is what I got for the apple and orange images:
Part 2.4: Multiresolution Blending
In order to blend together the images, I started off with the low features (from the Gaussian stack) at the lowest level, and added in the Laplacian features for each next layer. I ended up with these pictures:
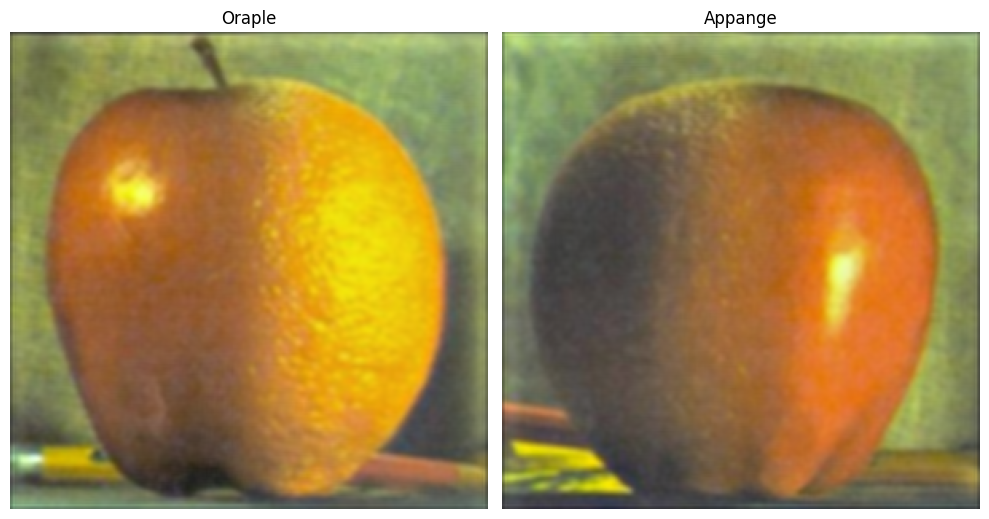
Here is another multiresolution blending example.

Finally, here is a multiresolution blending example with an irregular mask, featuring our two favorite stock image friends.
Sources
This webpage was developed with guidance from a conversation with ChatGPT. The conversation was used to structure the HTML and CSS layout. You can view the full conversation here.